

How Tinie’s Mac and Cheese Recipe Became a Family Favorite
There’s mac and cheese… and then there’s Tinie’s Mac and Cheese Recipe, creamy, cheesy, and absolutely legendary in our house. You know that kind of dish that doesn’t even make it to leftovers? Yeah, this is that.
I first tasted Tinie’s version at a Sunday potluck where everyone politely took a scoop, then went back for seconds, thirds, and (no shame) fourths. It had this perfect blend of sharp cheddar, a touch of spice, and that golden crust that dreams are made of. When I finally asked for the recipe, Tinie just winked and said, “It’s all in the roux, baby.”
Why will you love it? It’s weeknight-easy, kid-approved, and budget-friendly. You won’t need fancy ingredients, just pantry staples and a little kitchen magic. It’s the kind of comfort food that warms your soul without wrecking your schedule.
And if you’ve tried our Cheesy Baked Ziti before, this mac and cheese takes that same level of coziness and makes it even creamier. Want to double down on comfort? Pair it with our mini meatloaf recipe for a retro-inspired dinner the whole family will love.
Stick around. This recipe is as much about flavor as it is about heart, and I can’t wait for you to try it.
What is Tinie’s Mac and Cheese Recipe?
Okay, so first things first, who is Tinie? And why does their mac and cheese deserve its own recipe page? Fair questions. The short answer? Tinie is my aunt, neighbor, and unofficial culinary goddess who somehow turns everyday comfort food into something you crave for days.
Legend has it, Tinie whipped this recipe together during a last-minute family reunion where the only things in her fridge were elbow macaroni, cheese, and a prayer. The result? A bubbly, golden, can’t-stop-eating masterpiece that earned her lifelong status as the “mac queen” of the family.
You know what they say, “The way to a man’s heart is through his stomach”, but Tinie’s mac doesn’t discriminate. It’s won over toddlers, teens, and skeptical in-laws alike.
Curious now? You should be. Get ready to add a new go-to to your dinner rotation.
Why You’ll Love This Tinie’s Mac and Cheese Recipe
There are a million mac and cheese recipes out there, but here’s why this one stands out:
- It’s ridiculously creamy and packed with flavor. We’re talking real-deal, layered cheese flavor, not just bland noodles drowned in sauce. Tinie’s secret spice blend and that crispy, golden topping take it up a notch.
- It saves you serious cash. Why drop $15 on a so-so restaurant version when you can make a rich, crowd-pleasing tray at home for half the price? Plus, it feeds a crew. Leftovers (if you’re lucky enough to have any) are just as tasty the next day.
- It’s customizable. Want a little heat? Add jalapeños. Craving extra crunch? Top it with toasted panko or crumbled bacon. Tinie’s Mac and Cheese Recipe is like a blank cheesy canvas, paint it your way.
If you loved our One-Pot Creamy Chicken Pasta, you’ll be obsessed with how easy and flavorful this mac and cheese is.
So grab your whisk and preheat the oven. Your new favorite comfort food is about to become a regular on your dinner table.
How to Make Tinie’s Mac and Cheese Recipe
Quick Overview
This is comfort food made simple, no fancy gadgets, no culinary gymnastics. Just a creamy, ultra-cheesy classic with a crispy top that’s totally addictive.
Prep Time: 15 minutes
Cook Time: 25 minutes
Total Time: 40 minutes
Skill Level: Beginner-friendly, family-approved
It’s the kind of recipe you can memorize after a few rounds, and trust me, there will be a few rounds. Just like our breakfast pizza recipe, it delivers big on flavor without overcomplicating your time in the kitchen.
Key Ingredients for Tinie’s Mac and Cheese Recipe
Here’s what you’ll need to bring Tinie’s kitchen magic to life:

- 2 cups elbow macaroni, uncooked
- 2 tablespoons butter
- 2 tablespoons all-purpose flour
- 2 cups whole milk (warm it slightly for a smoother sauce)
- 2 cups sharp cheddar cheese, shredded
- 1/2 cup mozzarella cheese, shredded (for that gooey pull)
- 1/2 teaspoon garlic powder
- 1/4 teaspoon smoked paprika (optional, but adds a lovely warmth)
- Salt and pepper, to taste
- 1/2 cup breadcrumbs (for topping)
- 1 tablespoon olive oil or melted butter (to mix with breadcrumbs)
Step-by-Step Instructions
1. Boil the pasta:
Cook macaroni according to package directions, but shave a minute off for slightly al dente texture. Drain and set aside.
2. Make the roux:
In a large saucepan, melt butter over medium heat. Whisk in flour and cook for 1–2 minutes until it smells a bit nutty (this is the flavor base!).

3. Build the sauce:
Slowly whisk in warm milk, making sure there are no lumps. Keep stirring until the sauce thickens, about 4–5 minutes.
4. Add the cheese:
Remove the pan from heat. Stir in cheddar, mozzarella, garlic powder, paprika, salt, and pepper until melty and smooth.

5. Combine:
Fold the drained pasta into the cheese sauce. Mix well so every noodle is happily coated.
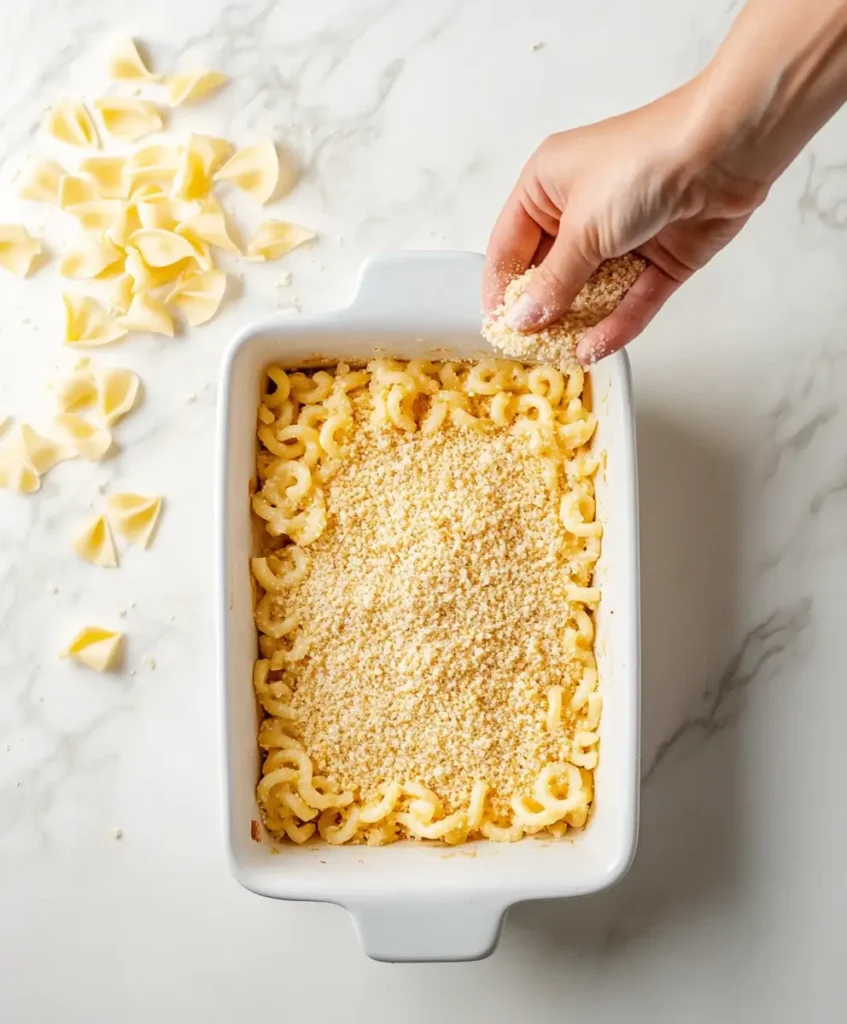
6. Prepare the topping:
In a small bowl, combine breadcrumbs with olive oil or melted butter. This gives you that iconic crispy finish.
7. Bake:
Pour the mac and cheese into a greased baking dish. Sprinkle with the breadcrumb topping. Bake at 375°F (190°C) for 20–25 minutes until bubbly and golden.
What to Serve Tinie’s Mac and Cheese With
Sure, Tinie’s Mac and Cheese Recipe can absolutely shine solo (and trust me, it often does), but pairing it with the right side dish? That’s where the magic really happens.
Here are some easy, delicious ideas to round out your mac night:
- Crispy Oven-Baked Chicken Thighs: The juicy, savory vibes of roasted chicken contrast perfectly with the creamy richness of the mac. Think comfort food power couple, similar to the combo in our buffalo chicken chili, which also brings heat and heart to the table.
- Garlic Butter Green Beans: A simple, snappy veggie side with a garlicky kick, ideal for cutting through the cheese and adding a bit of freshness.
- Tangy Coleslaw: For a cool, crunchy balance, coleslaw offers just the right zippy contrast to all that creamy, cheesy goodness.
- Iced Sweet Tea or Sparkling Lemonade: Because sometimes you just need a refreshing sip to reset between bites of decadence.
🍽️ Want to take it up a notch? Try serving it alongside our Honey-Glazed Meatloaf from the blog for the ultimate comfort food lineup.
And yes, this is exactly the kind of meal that makes people hang around your table a little longer.
Top Tips for Perfecting Tinie’s Mac and Cheese Recipe
If you want to turn a good mac into a great mac, these tips will help you level up, without making things complicated.
- Don’t skip the roux.
That butter + flour base? It’s the secret to a velvety cheese sauce that won’t go grainy. Take your time whisking, it should smell toasty, not burnt. - Warm your milk.
Adding cold milk straight to the roux can cause clumping. A quick zap in the microwave keeps things silky smooth. - Shred your own cheese.
Pre-shredded cheese has anti-caking agents that mess with meltiness. Take the extra two minutes. You’ll thank yourself. - Breadcrumbs = texture heaven.
Whether you go classic, panko, or even crushed crackers, a crunchy topping adds the perfect bite. If you’re a fan of textural contrast, don’t miss our perfect brookie recipe, a chewy-crispy dessert dream that finishes off any comfort meal on a sweet note. - Want to mix it up?
Try smoked gouda, pepper jack, or gruyère in the cheese blend. You can also stir in cooked bacon, roasted veggies, or a splash of hot sauce. - Avoid overbaking.
Once it’s golden and bubbly, it’s done. Overbaking can dry it out, no one wants sad mac.
Whether you’re new to the kitchen or a seasoned home chef, these tips keep your mac consistently creamy, cheesy, and crave-worthy.

Storing and Reheating Tips
Tinie’s Mac and Cheese Recipe makes a generous batch, and if you’re lucky enough to have leftovers (big if), here’s how to keep them tasting just as dreamy the next day.
How to Store
- Refrigerator:
Let the mac and cheese cool completely, then transfer to an airtight container. It’ll keep well for 3–4 days in the fridge. - Freezer:
Yep, it freezes beautifully! Portion into freezer-safe containers or zip-top bags (flatten for easy stacking), and freeze for up to 2 months. Just make sure it’s fully cooled before freezing.
How to Reheat
- Microwave:
Add a splash of milk or cream to your portion and cover loosely. Heat in 30-second bursts, stirring in between until hot and creamy again. - Oven:
Preheat to 350°F (175°C). Cover the mac with foil and heat for about 15–20 minutes. Uncover for the last 5 minutes to crisp up the top again.
💡 Pro tip: Don’t skip the added liquid when reheating. It brings the sauce back to life and keeps things from drying out.
Frequently Asked Questions
Can I make Tinie’s Mac and Cheese Recipe ahead of time?
Absolutely! Assemble everything, cheese sauce, pasta, topping, and refrigerate it (unbaked) for up to 24 hours. When you’re ready, bake as usual, adding 5–10 minutes to the cook time. Perfect for busy weeknights or stress-free entertaining.
What’s the best cheese for this recipe?
Tinie swears by sharp cheddar for bold flavor and mozzarella for that dreamy melt. But feel free to mix it up! Gruyère, fontina, or even a bit of cream cheese can all add richness and depth.
Can I make it gluten-free?
You sure can. Just swap the pasta with your favorite gluten-free version and use a 1:1 gluten-free flour for the roux. Most store-bought GF breadcrumbs work fine for the topping too.
How do I keep the mac and cheese from drying out?
The key is a balanced roux and enough sauce to coat the noodles generously. Also, don’t overbake. Add a splash of milk or cream when reheating to bring back that creaminess.
Let’s Get Cooking: Try Tinie’s Mac and Cheese Recipe Now
There’s just something about a bubbling, golden dish of Tinie’s Mac and Cheese Recipe that hits all the right notes, comforting, creamy, and so easy to make, it almost feels like cheating.
Whether you’re whipping it up for a cozy family dinner, meal prepping for the week, or showing off at your next potluck, this is one of those recipes that sticks. And if you’re looking for something equally crowd-pleasing yet a little unexpected, check out our creamy twist on seafood with this crab brulee recipe. You’ll come back to it again and again, not because you have to, but because you want to.
🍽️ So go on, grab that cheese grater, turn up your favorite cooking playlist, and make a little kitchen magic of your own. Then come back here and let me know how it turned out! I’d love to hear if you made any tweaks, added a spicy twist, or, let’s be honest, just devoured it straight from the pan.
👉 Drop a comment, leave a rating, or share your masterpiece with us on social! You never know who you might inspire to start their own mac and cheese tradition.

Tinie’s Mac and Cheese Recipe
Equipment
- Saucepan
- Whisk
- Baking dish
- Mixing bowls
Ingredients
Main Ingredients
- 2 cups elbow macaroni uncooked
- 2 tbsp butter
- 2 tbsp all-purpose flour
- 2 cups whole milk slightly warmed
- 2 cups sharp cheddar cheese shredded
- 0.5 cup mozzarella cheese shredded
- 0.5 tsp garlic powder
- 0.25 tsp smoked paprika optional
- salt and pepper to taste
Topping
- 0.5 cup breadcrumbs
- 1 tbsp olive oil or melted butter to mix with breadcrumbs
Instructions
- Preheat the oven to 375°F (190°C).
- Cook the macaroni according to package directions, but reduce the cooking time by one minute. Drain and set aside.
- In a large saucepan, melt the butter over medium heat. Whisk in the flour and cook for 1–2 minutes until it smells nutty and golden.
- Gradually whisk in the warm milk. Continue whisking until the sauce thickens, about 4–5 minutes.
- Remove from heat. Stir in cheddar, mozzarella, garlic powder, smoked paprika, salt, and pepper until fully melted and smooth.
- Fold the cooked macaroni into the cheese sauce until well coated.
- Transfer the mixture to a greased baking dish.
- In a small bowl, mix the breadcrumbs with olive oil or melted butter. Sprinkle evenly over the macaroni.
- Bake for 20–25 minutes until bubbly and golden on top. Serve warm.
2 thoughts on “Tinie’s Mac and Cheese Recipe: 5 Reasons It’s the Best Comfort Food”