Introduction to Lobster Tail Pastry
What is Lobster Tail Pastry?
Lobster Tail Pastry, often referred to as “sfogliatella” in Italian cuisine, is a delightful and visually striking dessert that has captivated the palates of pastry enthusiasts around the world. Its distinctive, shell-like appearance resembles a lobster tail, which is how it derives its name in English-speaking countries. The pastry is known for its crisp, flaky exterior made of thin, overlapping layers of dough, and a rich, creamy filling that varies based on regional and personal preferences.
Traditionally, the filling is made from ricotta cheese, semolina, sugar, and citrus zest, but variations include flavors like chocolate, almond, or even custard. The contrast between the crunchy outer shell and the soft, aromatic filling makes Lobster Tail Pastry a sensory delight, celebrated for both its texture and flavor profile.
Origin and Historical Significance
The origins of Lobster Tail Pastry can be traced back to 17th-century Naples, Italy. Its Italian name, “sfogliatella,” translates to “small, thin layers,” reflecting the intricate process of creating its signature flaky dough. The pastry is said to have been invented by nuns in a convent who sought a way to repurpose leftover semolina into a delectable treat.
The recipe gained prominence beyond the convent walls when it was introduced to the public by Italian bakers. Over time, the sfogliatella became a staple in Neapolitan pastry shops, celebrated as a symbol of the region’s culinary artistry. Italian immigrants brought the recipe to the United States, where it underwent modifications and became known as Lobster Tail Pastry, with larger versions and more diverse fillings catering to American tastes.
Today, Lobster Tail Pastry continues to hold a cherished place in Italian cuisine and the broader pastry world. Its intricate preparation and irresistible flavor make it a testament to the artistry and ingenuity of its creators, embodying centuries of tradition and cultural exchange.
Ingredients for Lobster Tail Pastry

Core Ingredients for the Dough
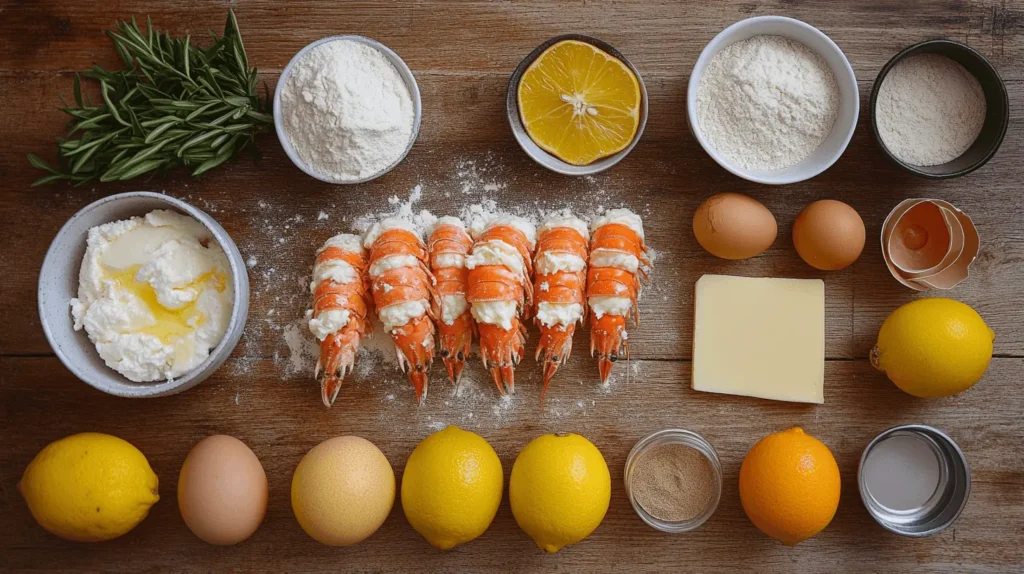
Creating the iconic flaky and crisp outer shell of a Lobster Tail Pastry requires meticulous attention to the dough. The core ingredients include:
- All-Purpose Flour: Forms the base of the dough, providing structure and elasticity.
- Butter or Lard: Essential for layering, it ensures the pastry’s signature flakiness.
- Water: Helps bind the ingredients and creates a pliable dough.
- Salt: Enhances the flavor of the dough and balances the sweetness of the filling.
These simple yet crucial ingredients come together to form a dough that is rolled and folded multiple times, creating the delicate, layered structure that defines the pastry.
Cream Filling Essentials
The luscious cream filling at the heart of the Lobster Tail Pastry is what sets it apart. The traditional filling consists of:
- Ricotta Cheese: Provides a creamy texture and rich flavor.
- Semolina Flour: Adds body to the filling and ensures a smooth consistency.
- Sugar: Sweetens the mixture to complement the pastry’s layers.
- Eggs: Help bind the filling and give it a light, custard-like quality.
- Citrus Zest (Lemon or Orange): Infuses the filling with a bright, aromatic note.
This combination results in a rich, smooth filling that perfectly contrasts the crispy exterior.
Additional Flavor Variants
While the traditional version is beloved for its simplicity, modern interpretations of Lobster Tail Pastry often feature creative twists. Some popular variants include:
- Chocolate Filling: A decadent alternative made with chocolate ganache or cocoa-infused ricotta.
- Almond Paste: Adds a nutty, slightly sweet flavor that pairs beautifully with the pastry’s texture.
- Custard or Pastry Cream: A silky option for those who prefer a lighter, vanilla-flavored filling.
- Fruit Compote: Incorporates seasonal fruits like berries or apricots for a tangy, refreshing twist.
- Nutella or Hazelnut Spread: Offers a modern, indulgent touch.
For inspiration on how to complement Lobster Tail Pastry with other seafood dishes, explore our Ultimate Guide to Baked Lobster Tails.
These flavor variants allow for personalization and innovation while staying true to the pastry’s timeless charm.
Essential Equipment and Tools
Tools for Shaping the Dough
Crafting the perfect Lobster Tail Pastry requires precision and specific tools to achieve its signature layered and shell-like appearance. Key tools include:
- Rolling Pin: Essential for rolling the dough into thin, even layers to create the pastry’s characteristic flakiness.
- Pastry Cutter or Knife: Used to cut the dough into strips or specific shapes needed for forming the pastry.
- Bench Scraper: A versatile tool for handling and manipulating the dough during the layering and folding process.
- Pastry Brush: Helps apply melted butter or lard between layers to create the distinctive flaky texture.
- Piping Bag: Necessary for filling the pastry with cream or other desired fillings with precision and ease.
Equipment for Baking
To ensure the Lobster Tail Pastry bakes evenly and achieves its signature golden-brown, crispy exterior, proper equipment is vital:
- Baking Sheet or Tray: A flat surface for arranging the pastries, ideally lined with parchment paper or a silicone baking mat to prevent sticking.
- Oven: A reliable oven with even heat distribution is crucial for the baking process. Convection ovens are especially useful for consistent results.
- Cooling Rack: Allows pastries to cool evenly, preventing the bottom from becoming soggy.
- Thermometer: Ensures the oven is at the correct temperature for optimal baking results.
Alternatives for Home Bakers
Home bakers may not have access to all specialized tools, but there are practical alternatives to achieve excellent results:
- Wine Bottle or Smooth Jar: Can substitute for a rolling pin in a pinch.
- Sharp Kitchen Knife: Works well as an alternative to a pastry cutter for shaping the dough.
- Plastic Sandwich Bags: Can be used as makeshift piping bags by snipping off one corner.
- Aluminum Foil or Nonstick Spray: Can replace parchment paper for lining baking trays.
- Standard Oven: While a convection oven is ideal, a regular oven can produce good results with careful monitoring of temperature and baking times.
These tools and alternatives ensure that whether you’re a seasoned baker or a home enthusiast, you can create Lobster Tail Pastries with ease and precision.
Step-by-Step Process for Making Lobster Tail Pastry
Preparing the Dough
- Mix Ingredients: Combine all-purpose flour, salt, and water in a mixing bowl to form a firm yet pliable dough.
- Knead the Dough: Knead the dough on a lightly floured surface until it is smooth and elastic.
- Rest the Dough: Wrap the dough in plastic wrap and let it rest for 30 minutes to relax the gluten.
- Roll Out the Dough: Using a rolling pin, roll the dough into a thin sheet, aiming for a consistent thickness.
- Apply Butter or Lard: Spread a thin layer of melted butter or lard over the entire surface of the dough.
- Roll and Layer: Roll the dough tightly into a log, creating layers. Wrap it in plastic wrap and refrigerate for at least an hour to firm up.
Shaping the Dough into Lobster Tail Shapes
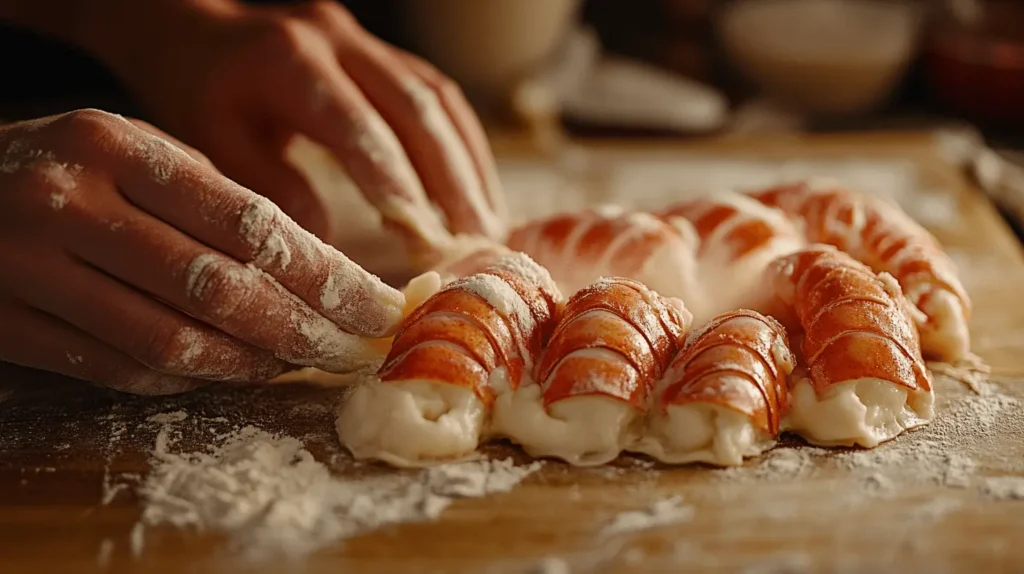
- Slice the Dough: Cut the chilled dough log into small, equal-sized pieces, about 1 to 2 inches wide.
- Form the Shells: Flatten each piece slightly with your fingers and gently press it into a cone shape, working outward to create the signature shell-like layers.
- Prepare for Filling: Ensure the center of each cone is hollow enough to hold the cream filling, but be careful not to break the layers.
Discover the art of preparing lobster dishes alongside pastry perfection in our How to Cook Frozen Lobster Tails guide.

Making the Cream Filling
- Combine Ingredients: Mix ricotta cheese, semolina, sugar, eggs, and citrus zest in a bowl until smooth and creamy.
- Optional Variants: Add any additional flavor elements, such as chocolate, almond paste, or fruit compote, if desired.
- Chill the Filling: Refrigerate the filling to allow it to firm slightly, making it easier to pipe into the pastry shells.
Assembling the Pastry
- Fill the Pastry: Using a piping bag, carefully fill the hollow center of each shaped dough piece with the prepared cream filling.
- Seal the Pastry: Lightly pinch the open edges to secure the filling inside, being careful not to disrupt the shell layers.
- Arrange on Baking Sheet: Place the filled pastries on a parchment-lined baking sheet, leaving space between each to allow for expansion.
- Bake: Preheat the oven to 375°F (190°C). Bake the pastries for 20-25 minutes or until golden brown and crispy.
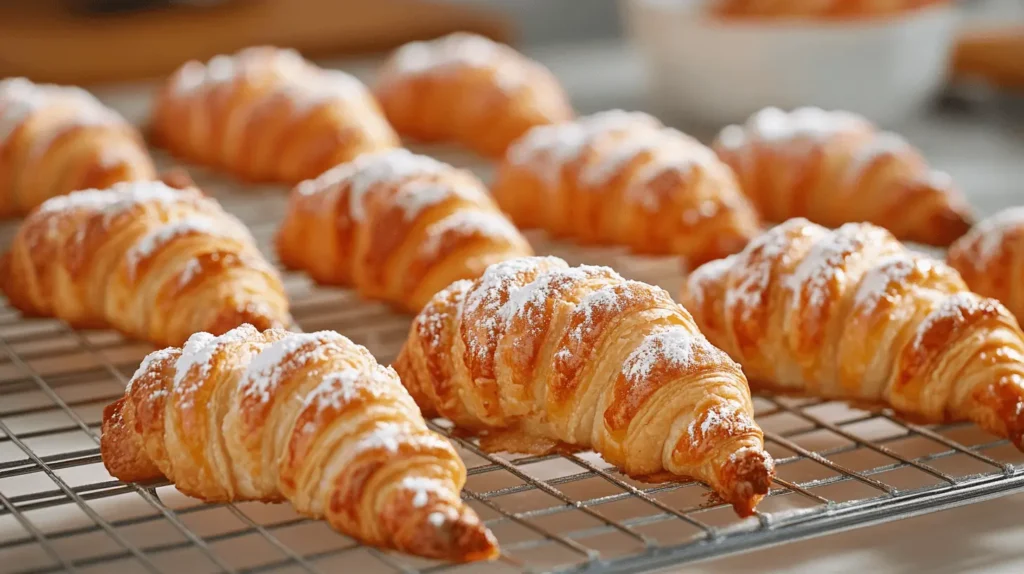
- Cool and Serve: Let the pastries cool on a wire rack before serving. Dust with powdered sugar for a finishing touch, if desired.
By following these steps, you can create Lobster Tail Pastries that are as visually stunning as they are delicious!
Tips for Perfecting the Dough
Achieving the Right Consistency
- Balance Moisture Levels: The dough should be firm yet pliable. Too much water will make it sticky and hard to work with, while too little will make it dry and prone to cracking.
- Knead Thoroughly: Proper kneading develops the gluten, giving the dough elasticity and structure. The final texture should be smooth and slightly elastic.
- Test for Readiness: After kneading, press the dough lightly with your finger. It should spring back slightly, indicating the right consistency.
Resting and Rolling Techniques
- Rest the Dough: Allow the dough to rest for at least 30 minutes before rolling. This step relaxes the gluten, making the dough easier to handle and preventing it from shrinking during rolling.
- Roll Thinly and Evenly: Use a rolling pin to achieve a uniform thickness. A thinner dough results in crispier, more defined layers.
- Apply Fat Generously: When rolling the dough into layers, spread melted butter or lard evenly and thoroughly between each layer to enhance flakiness.
- Chill the Dough: Refrigerate the dough log after rolling and layering. Chilling firms the fat, making it easier to shape and slice without compromising the layers.
Common Mistakes and How to Avoid Them
- Overworking the Dough:
- Issue: Over-kneading can make the dough tough and hard to roll.
- Solution: Stop kneading as soon as the dough is smooth and elastic.
- Skipping the Resting Period:
- Issue: Without resting, the dough becomes difficult to roll and may tear.
- Solution: Always allow the dough to rest for at least 30 minutes.
- Uneven Rolling:
- Issue: Thick or uneven dough results in inconsistent baking and layers.
- Solution: Roll slowly and use a rolling pin with guides if necessary.
- Not Using Enough Fat Between Layers:
- Issue: Skimping on butter or lard can lead to layers sticking together.
- Solution: Be generous and even in your application of fat.
- Overchilling the Dough:
- Issue: Dough that is too cold may crack when rolled or shaped.
- Solution: Let the chilled dough sit at room temperature for a few minutes before working with it.
By mastering these techniques and avoiding common pitfalls, you can perfect the dough for Lobster Tail Pastries, ensuring crisp, flaky layers every time.
Secrets to a Creamy and Flavorful Filling
Choosing the Best Ingredients
- Fresh Ricotta Cheese: Opt for high-quality, fresh ricotta cheese with a smooth texture. Avoid overly watery varieties, as they can affect the consistency of the filling.
- Premium Eggs: Use fresh eggs for a richer, more velvety filling. Eggs also help bind the ingredients and provide a custard-like consistency.
- Semolina Flour: Choose fine semolina for a smooth and creamy texture. Coarser varieties may create a grainy filling.
- Natural Citrus Zest: Freshly grated lemon or orange zest adds an aromatic touch. Organic citrus is preferred to avoid pesticides on the peel.
- Pure Sugar: Use granulated sugar to sweeten the filling without altering its texture.
Balancing Sweetness and Texture
- Sweetness Level: Adjust the sugar to your taste, ensuring it complements rather than overwhelms the pastry.
- Smoothness: Blend the filling ingredients thoroughly to avoid lumps. Straining ricotta before use can also improve the texture.
- Firmness: For a filling that holds its shape, chill it for 15–30 minutes before piping into the pastry shells. The semolina flour will help stabilize it during baking.
Incorporating Flavor Enhancers
- Citrus Infusion: Enhance the filling’s brightness with additional zest or a drop of citrus extract.
- Vanilla or Almond Extract: A splash of vanilla or almond extract can add depth and warmth to the flavor profile.
- Spices: For a unique twist, consider adding a pinch of cinnamon, nutmeg, or cardamom to the filling.
- Chocolate or Cocoa: Stir in melted chocolate or cocoa powder for a decadent variation.
- Liquors: A small amount of liqueur, such as amaretto or Grand Marnier, can elevate the flavor and add sophistication.
By selecting the finest ingredients, achieving the right balance of sweetness and texture, and thoughtfully incorporating flavor enhancers, you can create a filling that is not only creamy but also irresistibly flavorful.
Baking and Final Touches

Ideal Baking Temperature and Time
- Preheat the Oven: Set your oven to 375°F (190°C) to ensure even baking.
- Bake Duration: Place the pastries on a parchment-lined baking sheet and bake for 20–25 minutes, or until the outer layers turn a crisp, golden brown.
- Monitor Closely: Rotate the baking sheet halfway through to promote even browning. Keep a close eye during the final minutes to prevent overbaking.
Adding a Golden Finish
- Egg Wash: For an appealing golden finish, brush the pastries lightly with an egg wash (a mix of one beaten egg and a tablespoon of water or milk) before baking.
- High Heat Blast: If the pastries need extra color, raise the oven temperature to 400°F (200°C) for the final 2–3 minutes of baking.
- Post-Baking Rest: Allow the pastries to cool on a wire rack immediately after baking to preserve their crispness and avoid sogginess.
Optional Toppings and Glazes
- Powdered Sugar: Dust the pastries with powdered sugar for a classic finish and added sweetness.
- Citrus Glaze:
- Mix powdered sugar with fresh lemon or orange juice to create a thin glaze.
- Drizzle over cooled pastries for a zesty touch.
- Chocolate Drizzle:
- Melt semi-sweet or dark chocolate and drizzle it in thin lines over the pastries.
- This adds a rich, indulgent flavor.
- Honey or Syrup: Brush the pastries lightly with warm honey or a flavored syrup for a glossy sheen and subtle sweetness.
- Crushed Nuts: Sprinkle finely chopped almonds, pistachios, or hazelnuts over the pastries for a crunchy texture and nutty flavor.
By adhering to these baking techniques and incorporating optional finishing touches, your Lobster Tail Pastries will not only look exquisite but also taste irresistibly delightful.
FAQs about Lobster Tail Pastry
What Makes the Pastry Flaky?
The pastry’s signature flakiness comes from the layering process during dough preparation. Thin sheets of dough are layered with melted butter or lard, then rolled tightly and sliced. This technique, combined with the high baking temperature, creates steam between the layers, puffing them up into a crisp, flaky texture.
Can I Substitute Ingredients?
Yes, many ingredients can be substituted based on dietary preferences or availability:
- Butter or Lard: Use plant-based margarine for a vegetarian or vegan option.
- Ricotta Cheese: Substitute with mascarpone or a dairy-free alternative for lactose intolerance.
- Sugar: Replace with honey, agave, or a sugar substitute to adjust sweetness levels.
- Semolina Flour: Use cornstarch or fine wheat flour if semolina is unavailable, though the texture may differ slightly.
How Do I Prevent Filling Leakage?
- Chill the Filling: Ensure the filling is well-chilled before piping it into the pastry.
- Seal Properly: Pinch the edges of the dough firmly to enclose the filling.
- Avoid Overfilling: Use the recommended amount of filling to prevent spillage during baking.
- Check Dough Thickness: Thin dough can tear, leading to leaks. Ensure the pastry layers are sturdy enough to hold the filling.
Conclusion: Mastering the Lobster Tail Pastry Recipe
Summary of Key Steps
Mastering the Lobster Tail Pastry recipe involves attention to detail and patience, but the results are well worth the effort. Here’s a recap of the essential steps:
- Prepare the Dough: Focus on achieving a smooth, elastic consistency and layer it with butter or lard for flakiness.
- Shape the Pastry: Carefully roll, slice, and form the dough into the iconic lobster tail shape while preserving the delicate layers.
- Craft the Filling: Create a creamy, flavorful filling using high-quality ingredients like ricotta cheese, semolina, sugar, and citrus zest.
- Assemble and Bake: Fill the pastries, seal them properly, and bake to a golden perfection, ensuring a crisp exterior and luscious interior.
- Finish with Flair: Add optional toppings like powdered sugar, glazes, or drizzles to enhance both appearance and taste.
For a deeper dive into lobster-focused recipes, visit our What to Serve with Lobster Tails for pairing ideas.
Encouragement to Experiment and Enjoy
Lobster Tail Pastry is a testament to the art of baking, combining texture, flavor, and visual appeal in a single delightful creation. While tradition provides the foundation, don’t hesitate to experiment with new fillings, flavor twists, and creative presentations to make the recipe your own.
Whether you’re savoring a classic ricotta-filled pastry or indulging in a chocolate-infused variation, the joy lies in the process as much as in the final bite. Embrace the challenge, enjoy the journey, and take pride in mastering this timeless dessert that promises to delight anyone lucky enough to taste it. Happy baking!


1 thought on “Master the Art of Lobster Tail Pastry: Ingredients, Steps, and Tips”