
Rethink Your Chili Game: A Simpler Way to Cook
When it comes to making chili, one of the most common steps in traditional recipes is browning the meat first. But what if you’re short on time, looking for an easier way to prepare chili, or simply curious to see if skipping this step makes a difference? You’re in the right place!
Making chili without browning the meat first can save you valuable time and effort while still delivering a hearty, flavorful dish. Whether you’re using ground beef, turkey, or plant-based meat substitutes, this method is surprisingly versatile and beginner-friendly. Plus, it opens up a whole new world of possibilities for vegetarian and vegan variations.
In this article, we’ll explore why you might skip the browning step, how to adjust your recipe for maximum flavor, and step-by-step instructions to create the perfect pot of chili without browning meat. Whether you’re a busy home cook or just looking to simplify your favorite comfort food, this guide will have you serving up a delicious, steaming bowl of chili in no time.
Stay tuned as we dive into the why, how, and what to avoid to make your chili a success—no browning required!
Why Skip Browning the Meat in Chili?
Browning meat before adding it to chili is a long-standing tradition in cooking, but there are several valid reasons why skipping this step might work better for certain recipes or situations. Let’s take a closer look at why skipping the browning step is a viable option.
Common Reasons for Skipping the Browning Step
- Time-Saving Convenience:
For busy cooks, skipping the browning step can shave off precious minutes from the cooking process. By adding raw meat directly into the pot, you save time on both cooking and cleaning since there’s no need to use an additional skillet. - Beginner-Friendly:
If you’re new to cooking, browning meat properly might feel like a daunting task. Skipping this step makes the process simpler, allowing beginners to focus on assembling ingredients and building flavors. - Slow Cooker or Instant Pot Recipes:
Many slow cooker or pressure cooker recipes are designed to skip browning altogether. These appliances allow the ingredients to cook and meld together over time, creating a rich and flavorful chili even without searing the meat first. - Healthier Cooking:
Browning meat often requires additional oil or fat, which adds extra calories to the dish. Skipping this step can result in a leaner chili, especially if you use low-fat meat or opt for vegetarian alternatives.
How Does Browning Affect Flavor and Texture?
Browning meat triggers the Maillard reaction, a chemical process that develops a deep, savory flavor and adds caramelized notes to the dish. While this reaction enhances flavor, it’s not the only way to create a delicious chili.
When you skip browning, the meat releases its juices directly into the chili as it cooks. This can create a different flavor profile—less smoky but still hearty and satisfying. The meat’s juices mix with the spices and other ingredients, giving the chili a rich, cohesive taste.
Pro Tip: If you’re concerned about missing the bold flavor of browned meat, you can enhance your chili by adding ingredients like smoked paprika, chipotle peppers, or even a splash of liquid smoke. Looking to elevate your chili further? Check out our tips on how to make chili taste homemade for easy flavor-enhancing techniques.
Is It Still Safe to Skip Browning?
Yes, it’s completely safe to skip browning meat as long as you cook the chili thoroughly. The raw meat will cook safely when simmered in the pot, slow cooker, or pressure cooker for the proper amount of time. Ensure the meat reaches an internal temperature of at least 160°F (71°C) for ground beef or 165°F (74°C) for poultry.
To avoid any texture issues, stir the chili occasionally to ensure even cooking and prevent the meat from clumping together.
Ingredients Needed for Chili Without Browning Meat
Making chili without browning the meat first is all about balancing the flavors and textures so that you don’t miss out on the depth traditionally added by the browning step. Here’s everything you’ll need to create a flavorful and hearty chili.
Essential Ingredients for Chili Base
- Protein Options:
- Ground Meat: Ground beef, turkey, chicken, or pork can all be added raw. Choose a lean or regular fat content based on your preference.For a spicier variation, you might enjoy this Buffalo Chicken Chili Recipe, which balances bold flavors with a simple preparation method.
- Plant-Based Protein: If you’re skipping meat altogether, use textured vegetable protein (TVP), lentils, or pre-seasoned plant-based crumbles.
- Beans:
- A mix of kidney beans, black beans, or pinto beans is classic for chili. Use canned beans for convenience or dried beans if you have extra time to soak and cook them.
- Tomatoes:
- Canned Diced Tomatoes: For the base of your chili.
- Tomato Paste or Sauce: Adds thickness and richness to the dish.
- Broth or Stock:
- Use chicken, beef, or vegetable broth as the liquid base to create a rich and well-seasoned chili.
- Vegetables:
- Common options include chopped onions, garlic, bell peppers, celery, and jalapeños. These contribute flavor and texture.
- Spices and Seasonings:
- Chili powder, cumin, smoked paprika, oregano, garlic powder, and onion powder.
- Add a pinch of cayenne or red pepper flakes for heat.
- Optional Ingredients for Depth:
- Dark chocolate or unsweetened cocoa powder (a small amount for added richness).
- A splash of vinegar or lime juice for brightness.
Ingredient Substitutions for Different Tastes
- Meat-Free Alternatives:
- Substitute tofu, tempeh, or mushrooms for ground meat to make a vegetarian chili.
- Tomato-Free Chili:
- If you’re avoiding tomatoes, use roasted red peppers blended into a smooth base with broth.
- Thicker Chili:
- Add crushed tortilla chips or masa harina during cooking to thicken the chili naturally.
- Lower-Sodium Option:
- Use low-sodium broth, beans, and tomato products to control salt levels.
Pre-Cooking Tips for Best Results
- Chop Ingredients Evenly:
Dice your vegetables and other ingredients into uniform sizes so they cook evenly, ensuring a consistent texture throughout the chili. - Season the Meat Before Adding:
If using raw ground meat, mix in a portion of the seasonings before adding it to the pot. This allows the spices to penetrate the meat for more flavor. - Rinse and Drain Canned Ingredients:
Rinse canned beans to remove excess sodium and drain any liquid from canned vegetables to avoid a watery chili. - Choose the Right Pot:
Use a heavy-bottomed pot, Dutch oven, or slow cooker for even heat distribution.
Step-by-Step Guide to Making Chili Without Browning Meat
Cooking chili without browning the meat first is a straightforward process that requires layering ingredients strategically and letting time and heat do the magic. Below is a detailed step-by-step guide to ensure you achieve a flavorful and hearty chili.

Step 1: Preparing the Ingredients
Before you start cooking, gather and prep your ingredients:
- Chop Vegetables:
- Dice onions, garlic, bell peppers, and any other vegetables you’re using. For extra spice, finely chop jalapeños or other hot peppers.
- Measure Spices:
- Mix chili powder, cumin, smoked paprika, oregano, and any other spices in a small bowl for easy use during cooking.
- Rinse and Drain:
- If you’re using canned beans, rinse and drain them to remove excess sodium and starch.
- Optional Prep for Raw Meat:
- For ground meat, you can mix some of the spice blend into the raw meat for added flavor.
Step 2: Layering the Ingredients
The key to making chili without browning meat is layering the ingredients in the correct order for even cooking and balanced flavors:
- Start with Vegetables:
- Add diced onions, garlic, and bell peppers to your pot or slow cooker. If you’re using a stovetop, sauté the veggies briefly in a splash of broth or water to soften them (optional).
- Add the Meat or Protein:
- Place raw ground meat or plant-based protein directly into the pot. Break it into smaller chunks or crumbles for even cooking.
- Incorporate Beans and Tomatoes:
- Add canned beans, diced tomatoes, and tomato paste to the pot. Stir to distribute them evenly.
- Pour in Broth or Liquid:
- Add just enough broth to cover the ingredients, leaving room for the chili to simmer and thicken.
- Sprinkle in Spices:
- Add the pre-measured spices and mix thoroughly to ensure the flavors are evenly distributed.
Step 3: Cooking Methods Without Browning
You can use a variety of methods to cook chili without browning the meat. Here’s how to do it with different tools:
Stove-Top Method
- Bring the mixture to a gentle boil over medium-high heat.
- Reduce the heat to low and let the chili simmer for 1–2 hours, stirring occasionally to prevent sticking.
- Adjust the liquid level as needed, adding more broth if the chili becomes too thick.
Slow Cooker Method
- Transfer all ingredients to the slow cooker.
- Cook on low for 6–8 hours or on high for 3–4 hours.
- Stir occasionally if possible, but this step is optional.
Instant Pot Method
- Set the Instant Pot to sauté mode and cook the vegetables briefly with a splash of broth.
- Add the remaining ingredients, seal the lid, and set the pressure cooker to manual high pressure for 15–20 minutes.
- Perform a natural release or quick release, stir, and serve.
Step 4: Adjusting and Thickening Chili
As the chili cooks, you can tweak the flavor and texture:
- Season to Taste:
- About 30 minutes before the chili is done, taste and adjust the seasoning. Add more chili powder, salt, or a splash of lime juice for brightness.
- Thicken the Chili:
- If the chili is too thin, stir in a tablespoon of masa harina, crushed tortilla chips, or cornstarch mixed with water. Simmer for 10 minutes to thicken. If you’re looking for creative ways to thicken your chili, our guide on how to thicken white chicken chili without flour offers helpful ideas.
Step 5: Serving and Topping Ideas
Once the chili is done, it’s time to serve! Here are some ideas to make your bowl extra special:
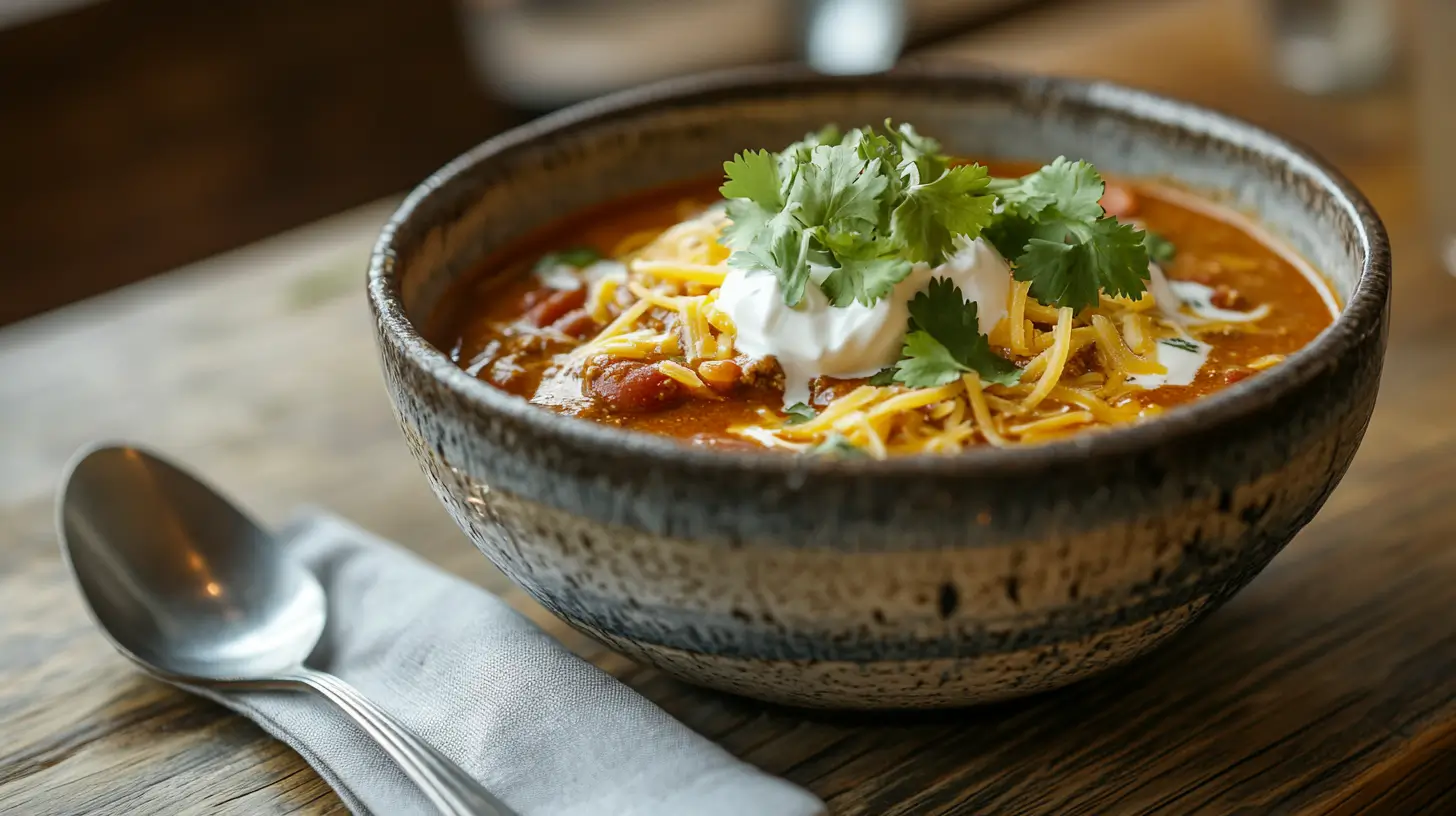
- Classic Toppings:
- Shredded cheese, sour cream, sliced avocado, or chopped cilantro.
- Spicy Kick:
- Add sliced jalapeños or a drizzle of hot sauce.
- Crunchy Additions:
- Crushed tortilla chips, cornbread croutons, or fried onions for texture.
- Side Dishes:
- Serve with warm cornbread, a side salad, or steamed rice for a complete meal.

Cooking Methods Compared: Traditional vs. No-Browning Chili
Now that you know how to make chili without browning meat first, it’s worth exploring how this method stacks up against the traditional approach. Whether you’re wondering about flavor, texture, or overall cooking time, here’s a detailed comparison to help you understand the differences.
Flavor Comparison
- Traditional Chili with Browned Meat:
- Browning meat caramelizes its natural sugars through the Maillard reaction, creating a rich, savory depth of flavor. This method is great for those who love bold, smoky, and slightly charred notes in their chili.
- No-Browning Chili:
- While it lacks the caramelized flavor from browning, chili without this step has a cleaner, smoother taste. The meat’s juices blend with the spices and other ingredients, allowing the chili to develop a cohesive and well-rounded flavor profile.
- Pro Tip: Enhance the flavor by incorporating smoked spices like chipotle powder or smoked paprika, or add umami boosters like soy sauce or Worcestershire sauce.
Time-Saving Advantages
- Traditional Chili:
- Browning meat adds an extra step to the cooking process, typically requiring an additional 10–15 minutes of prep time and an extra pan to clean.
- No-Browning Chili:
- By skipping this step, you save time and effort. This method is perfect for busy cooks who want a hearty, flavorful meal without the hassle of browning.
Texture Differences
- Traditional Chili:
- Browning can create a firmer, slightly crispy texture on the outside of the meat, which holds up well in the chili.
- The overall dish may have a thicker and slightly oilier texture due to the rendered fat from the browning process.
- No-Browning Chili:
- Meat cooked directly in the chili becomes softer and more tender, almost melting into the dish. This creates a more uniform texture, especially if you’re using ground meat.
- Tip for Texture: To avoid clumps of meat, stir frequently during cooking to break it up into smaller, even pieces.
Nutritional Differences
- Traditional Chili:
- Browning typically requires oil or fat, which can add extra calories to the dish.
- Some of the meat’s fat may render out during the browning process and be discarded, slightly reducing the overall fat content.
- No-Browning Chili:
- Skipping the browning step eliminates the need for added oil, making it a slightly leaner option. However, all the meat’s natural fat remains in the dish, which may result in a slightly richer consistency.
Best Use Cases for Each Method
- When to Brown Meat:
- Choose this method when you want bold, smoky flavors and have the time for extra preparation. It’s ideal for chili competitions, special gatherings, or when you want to impress guests.
- When to Skip Browning:
- Perfect for busy weeknights, large batch cooking, or slow cooker recipes. This method is also better suited for those seeking a lighter, simpler chili or experimenting with vegetarian variations.
Vegetarian and Vegan Options
If you’re skipping meat altogether, you can still create a flavorful, hearty chili that rivals any traditional recipe. By incorporating plant-based ingredients and umami-rich seasonings, vegetarian and vegan chili can deliver just as much depth and satisfaction.

Here’s how to do it:
Meat Substitutes
- Plant-Based Crumbles:
- Use store-bought plant-based ground “meat” alternatives made from soy, pea protein, or other vegetables. Brands like Beyond Meat or Impossible Foods work particularly well and mimic the texture of ground meat.
- Lentils:
- Lentils are an excellent alternative that adds a similar hearty texture to chili. Use red lentils for a softer texture or green/brown lentils for a firmer bite.
- Tofu or Tempeh:
- Crumble tofu or tempeh into small pieces and mix it with chili spices. For added texture, roast or pan-sear the tofu before adding it to the chili.
- Mushrooms:
- Finely chop or dice mushrooms like cremini, portobello, or shiitake. They bring a natural umami flavor and a chewy texture similar to meat.
- Beans:
- Go heavy on the beans! Kidney beans, black beans, and chickpeas are all great options to bulk up vegetarian chili.
Enhancing Flavor Without Meat
- Umami Boosters:
- Add ingredients that replicate the savory depth meat provides:
- Miso Paste: A spoonful stirred into the chili gives it a salty, rich flavor.
- Soy Sauce or Tamari: A splash enhances the overall savoriness.
- Nutritional Yeast: Adds a cheesy, nutty flavor perfect for vegan dishes.
- Add ingredients that replicate the savory depth meat provides:
- Smoky and Spicy Ingredients:
- Use smoked paprika, chipotle powder, or even a few drops of liquid smoke to mimic the flavor of browned meat.
- Tomato Paste and Cocoa Powder:
- Tomato paste creates a rich base, while unsweetened cocoa powder or dark chocolate adds subtle complexity and richness to the chili.
- Fresh and Dried Herbs:
- Add fresh cilantro, oregano, or thyme, and finish with a squeeze of lime juice to brighten the flavors.
Texture Tips for Vegetarian Chili
- Use Layered Ingredients:
- Combine different textures like beans, lentils, mushrooms, and vegetables for a chili that’s hearty and satisfying.
- Thickening the Chili:
- Use cornstarch, masa harina, or crushed tortilla chips to achieve the perfect consistency.
- Vegetable Variety:
- Add hearty vegetables like sweet potatoes, butternut squash, or zucchini to bulk up the dish and provide contrast in texture.
Suggested Combinations
Here are some vegetarian and vegan chili ideas to get you inspired:
- Spicy Black Bean and Lentil Chili:
- Combine black beans, red lentils, diced tomatoes, and chipotle peppers for a smoky, spicy twist.
- Sweet Potato and Chickpea Chili:
- Use cubed sweet potatoes and chickpeas as the base, with cumin and cinnamon for a slightly sweet and warming flavor.
- Mushroom and Tempeh Chili:
- A combination of finely diced mushrooms and crumbled tempeh creates a meaty, umami-packed chili.
- Three-Bean Vegan Chili:
- Use a mix of kidney, pinto, and black beans with a generous dose of chili powder, paprika, and garlic for a classic, protein-rich option.
FAQs About Making Chili Without Browning Meat
Here are answers to some frequently asked questions about cooking chili without browning meat. Whether you’re curious about techniques, ingredients, or storage tips, this section has you covered!
Can I Use Frozen Meat Without Browning It?
Yes, you can use frozen meat directly in chili without browning it first. However, there are a few considerations:
- Defrosting Optional:
- While it’s not necessary to thaw frozen ground meat before adding it to the chili, defrosting allows for more even cooking. If you add it frozen, make sure to stir frequently to break it up as it cooks.
- Cooking Time:
- Frozen meat will take slightly longer to cook, so adjust your cooking time accordingly. Check the internal temperature to ensure it’s fully cooked (160°F for beef, 165°F for poultry).
What’s the Best Pot for This Method?
Choosing the right cookware ensures even cooking and helps you avoid burning or sticking. Some great options include:
- Dutch Oven:
- Perfect for stovetop cooking, a Dutch oven retains heat well and allows for long, slow simmering to build flavor.
- Slow Cooker:
- Ideal for hands-off cooking, slow cookers allow the chili to simmer for hours, making it rich and flavorful.
- Instant Pot:
- For faster results, use an Instant Pot or pressure cooker to cook chili in a fraction of the time while still developing deep flavors.
Can I Still Get a Smoky Flavor Without Browning?
Absolutely! You can add smoky flavors to your chili without browning the meat by using these ingredients:
- Smoked Paprika: Adds a subtle smokiness and depth.
- Chipotle Peppers in Adobo Sauce: These bring both heat and smokiness.
- Liquid Smoke: Just a few drops will give your chili a bold, smoky kick.
- Fire-Roasted Tomatoes: Use canned fire-roasted tomatoes for a smoky, charred taste in the base.
Is No-Browning Chili Suitable for Meal Prep?
Yes, chili made without browning meat is great for meal prep because it’s quick, easy, and stores well. Here’s how to do it:
- Storage:
- Allow the chili to cool completely before transferring it to airtight containers. Store in the refrigerator for up to 4 days or in the freezer for up to 3 months.
- Reheating:
- Reheat on the stovetop over low heat or in the microwave, stirring occasionally to ensure even heating.
- Batch Cooking Tip:
- Make a double batch and freeze individual portions for a quick and hearty meal later.
How Long Should I Cook No-Browning Chili?
The cooking time depends on the method you use:
- Stove-Top: Simmer on low for 1–2 hours. Stir occasionally and check the liquid level, adding broth if needed.
- Slow Cooker: Cook on low for 6–8 hours or on high for 3–4 hours.
- Instant Pot: Pressure cook on high for 15–20 minutes. Allow natural release for at least 10 minutes before serving.
Will Skipping Browning Affect Texture?
The texture of the meat will be softer and more uniform compared to browned meat, but this isn’t a drawback for everyone. Here are a few tips to manage texture:
- Stir Frequently: Break up the meat during cooking to avoid clumps.
- Choose the Right Meat: Leaner meats, like ground turkey or chicken, tend to stay firmer.
- Add Texture: Include ingredients like beans, vegetables, or even plant-based proteins to add variety and interest.
Make Delicious Chili, Your Way
Making chili without browning meat first is a simple, time-saving approach that doesn’t compromise on flavor or satisfaction. By skipping the traditional step of searing the meat, you can create a rich, hearty dish that’s perfect for busy weeknights, meal prep, or when you simply want a no-fuss recipe.
Whether you’re a beginner in the kitchen or an experienced cook looking for a quick and easy alternative, this method is incredibly versatile. From using raw ground meat to experimenting with plant-based proteins, the possibilities are endless. With the right balance of spices, vegetables, and cooking techniques, your chili will be just as flavorful as the traditional version.
Remember, the key is to let the ingredients cook together over time, allowing the flavors to meld and develop. Don’t forget to add your favorite toppings, like shredded cheese, sour cream, or a squeeze of lime, to elevate your chili to the next level.
Now that you have all the tools and tips for making chili without browning meat, it’s time to grab your pot and get cooking. Whether it’s a cold day or you’re simply craving comfort food, this easy chili recipe is sure to become a household favorite.